Sometime last year I promised myself that I would commit to this project. I said that I wouldn’t let this blog join the cemetery of projects I started but never followed through on. I really wanted to create a special space on the internet that I could be proud of.
But having no energy left over from working a job that I needed for financial reasons is no joke. For me, it was (and still is!) very difficult to work past.
However, a lot has changed in the last year and a half:
I got a new job! I can’t say my previous job was all bad- it gave me the foundation of knowledge in IT that I needed to land my current job. I also met great people that really pushed me to find my voice and gave me confidence in a way that no other job has ever done. I think that if it weren’t for my last job, I don’t think I would’ve been able to land my new job as a service desk technician with a fantastic company.
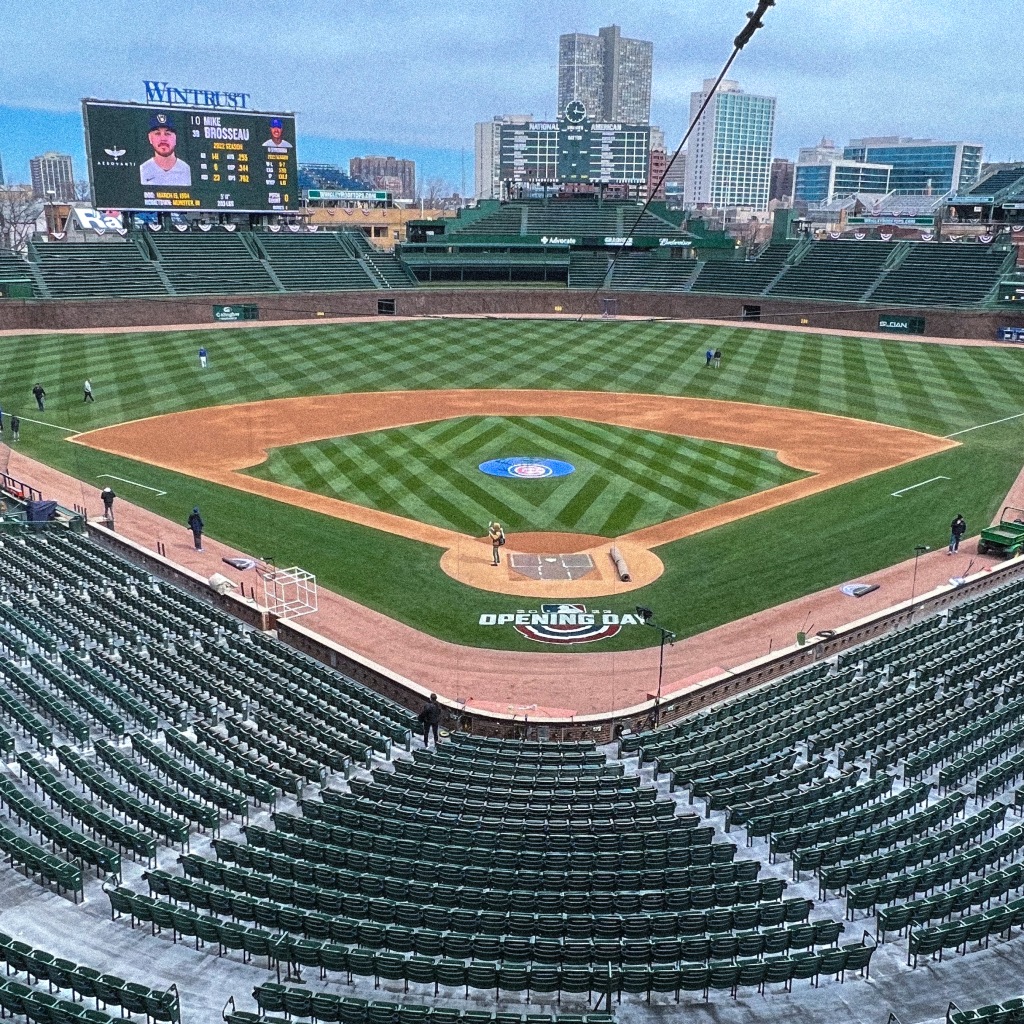
I moved! This new job is in Chicago. On one hand, it’s exciting and something I have wanted to do for a long time. On the other hand, it’s been challenging emotionally and financially. Being away from my boyfriend and my dogs, having a hard time finding a new place to live. We also have to physically move the bulk of our stuff from one side to another- not looking forward to that.
I tackled my health! I started to tackle my mental health with medication- and it really helped me. I also saw improvements in my overall health. But this will be another hurdle to overcome- I have to find another provider that I like AND is covered by my insurance. That is never an easy task.
I’m one step closer to financial freedom! Don’t get me wrong, I am by no means where I want to be financially speaking. But if I compare myself to where I was roughly a year ago- I say I’m headed in the right direction. Maybe I’ll be a little more vulnerable and open in a later post as to what that means for me, but for now, I think I’m in a spot where I have the energy to focus on different projects that I’ve been wanting to expand- like this blog.
New job views
That being said, when I started this, the main goal was to learn more and eventually land a Software Developer job. While I’m not nixing that completely, my progress toward that goal has slowed significantly. I still want to explore topics in tech, but it might include more IT-related subjects than previously planned.
After practicing with CSS and learning more about vw and vh, I decided to look at my code again to see if I can fix my landing page.
What is the issue with my landing page?
Like many websites today, I wanted my page to be responsive across screens of different sizes. When I was using Google Chrome’s Developer Tools, I noticed that my profile picture was more of an oval shape around the media query cut-off point of 900px.
Now that I’ve had more practice with CSS, I’m looking at my code and wondering why I put a height declaration in my media query as well as a width declaration.
Just to be sure, I commented out the height declaration and previewed my code (after making sure my file is saved!) with Live Server. Sure enough, my profile picture doesn’t turn into an oval in the 750 to 900px range.
I did take it a step further and changed my width pixels and played around with viewport units.
I was about to skip blogging for Week 4 because it feels like I don’t have any updates.
My mental health was in shambles. I did the bare minimum when it came to my #100Devs work, and I was definitely not connecting with anyone.
One thing though: I do want to talk about mental health. I want to normalize talking about it because I know that I’m not the only one that goes through periods where everything just feels like shit and it feels like nothing is going right.
But I got it into my head that I need this blog post to be organized, have some clear topic points and maybe some nice graphics to go along with it. And that discouraged me from even starting this blog post at all.
Mental health is rarely clear or organized. As my friend Debby said “It’s real. Expression doesn’t always have to be long or thorough or complete. It just is.”
Get you a friend like Debby, because she is absolutely right.
To me, having a bad mental health day (or week, or year) is oversleeping, not having the energy to do anything, let alone study. It’s a time where my thoughts are harshest on me and imposter syndrome can just walk into my thoughts and make itself at home.
It’s a time where the negative can easily overshadow the positive. And there were some positives! This past week, I passed a class that make me closer to getting my degree!
I willed myself to check in and watch Leon’s streams lives, but on both days I felt myself mentally check out early. On Friday, I watched Independence Day. And that’s it.
I know that there might be some life lesson that I can connect with Leon’s message of “I’m a baddie that writes bad code” but I’m going to leave that for another day.
For now, I’m going to drink some soothing tea, repeat some positive affirmations, and be nice to myself. Maybe I’ll watch Independence Day again. Maybe.
Long story short: I felt like shit. Take care of yourself y’all.
Today marks the end of another week of #100Devs. It feels like it’s been more than a week because it’s been jam-packed with things to do.
It’s been a challenge to balance #100Devs, schoolwork, and also take care of my mental health. I would like to give kudos to everyone who is going through #100Devs and also juggling a job(s), schoolwork, parenthood, caregiver-hood, or any combination of the above. This is a lot of work.
Adjusted workflow
It’s been a few weeks now, but I feel like if I don’t follow my workflow, I would not be doing half the things that I’ve done so far. When I first started, I wanted to make sure I’m not adding any redundant steps because my brain would start wanting to avoid doing any task if I had to record it multiple times.
What is working for me:
Plan my week using Notion
Check in with myself in the morning using Goodnotes
Track #100Devs assignments with Notion
Track my overall progress with #100DaysOfCode in Notion.
My creative outlet project this week was learning how to create repeating patterns on Procreate. I followed this youtube video because it was so easy to follow.
I redid my GoodNotes templates with a new background I created and went ALL OUT for my February theme. But that’s ok- it’ll only be for 28 days and I think it looks cute.
#100Devs and #100DaysOfCode
I debated on whether or not to start #100DaysOfCode because one of the things Leon stresses all the time is to not take on too much during this time. That will put you on the fast track to burn out and I am determined to finish this and get a software development job.
But #100DaysOfCode doesn’t have a curriculum. It’s just a way to document what you are learning while you code for at least an hour a day for the next 100 days. I’m going to use it as a way to go deep into the topics that Leon is teaching us but make sure I don’t go wide. I’m not going to try and learn it all in 30 weeks and set myself up for failure.
I shared the Notion table that I created to keep track of all the #100Devs assignments and was happily surprised that so many people found it helpful. It’s one of those things that I mentally underplayed to myself and, as a result, didn’t even think about sharing it. But I’m happy that I ended up sharing it because of all the positive feedback I’ve received from it.
If you want to duplicate the template to your Notion notebook, you can find the template here.
Going deep, not wide
For days 1, 2, and 3 of #100DaysOfCode, I’ve been focusing on practicing my knowledge of HTML and CSS.
Part of the homework is to read Shay Howe’s Learn to Code Advanced HTML & CSS. While his website is a fountain of knowledge, reading is not the most efficient way that I personally learn.
I’m trying to go through the articles and get a basic overview of the topics and keywords he talks about, but then I looked for different resources where I can practice for free.
For CSS selectors, CSS Diner was making its rounds in different Discord channels. And I absolutely love it! I haven’t finished all the levels, but I’m making it a goal to finish it whenever I can in the next few days. Essentially, you have to type the CSS selector for the item(s) bouncing on the screen.
Another cool resource for me is frontendmentor.io. It’s full of challenges that you can start to practice your code. You can’t peek at the solution until you’ve submitted your own code, so it really pushes you to find your own solution. You can filter the challenges from Newbie to Guru and also select what languages you want to use.
I started with a Newbie challenge that only used HTML & CSS. It was a fun exercise trying to center the QR code card and make it responsive to different screen sizes. I learned about viewport units and how they are responsive to the size of the screen, but they’re not exactly like percentage units.
If you want to check out my submission, click here. Any feedback or suggestions is welcome!
What’s next:
My plans for the next week include:
finish Shay’s articles
incorporate Anki cards and revision into my life a little bit more
keep the consistency in working on my code
find a way to get more exercise in my routine. I’ve been pushing this back, but I know it’s important when it comes to mental and overall health. I’m thinking of picking up some yoga at home. How you get your workout in?
Documenting my journey through this 30-week program, #100Devs
There is no shortage of programs that claim to open doors for you after you complete them. But it feels like they all come at a price.
This is why, when I heard about #100Devs, I thought this was too good to be true. I mean, come on- an agency with a free fully remote software engineering program? You can’t blame me for being just a little bit skeptical. Leon even mentioned that a lot of people signed up under burner accounts because they didn’t believe this was real. Did I mention that it’s free?
But I had started to feel just a little bit helpless and stuck in my attempt to transition into tech again, so I decided to check it out and see what Leon and the program are about. After all, I had nothing to lose.
Well, Thursday marked the end of Week 2 of this program and it feels like the real deal.
What is #100Devs?
As mentioned before, it is a software engineering program. It’s 30 weeks long, fully remote. We meet every Tuesday and Thursday at 6:30 pm EST on Twitch. There are also office hours on Sunday.
The man behind the program is Leon. He is a Managing Director of Engineering at Resilient Coders and his passion for teaching and helping others is evident through the screen. He started #100Devs as a way to help those affected by the pandemic. You can read more about him and #100Devs on his website: https://leonnoel.com/100devs/
But I want to tell you more about #100Devs as a participant. I want to document my growth in my technical skills and my self-confidence.
Week 1 and 2
Week one and two felt a little like syllabus week. We did dip our toes into the technical side of it all by learning about the client server model and the basics of HTML and CSS.
But it was more of a chance for Leon to introduce himself and to introduce #100Devs to over 6k streamers on twitch. He even reached 7k at one point. It’s a time for us to get comfortable with different expectations, resources, and to meet a whole ton of new people with similar goals.
It’s been refreshing to see so many people who are determined to make the same changes that I want to make, to bond over going through the same highs and lows that comes with starting a new challenge.
Yet the best part of this experience thus far has been listening to all the motivational messages that Leon is telling us. In the middle of hustle culture and the rise and grind mentality, he is repeatedly telling us to take care of ourselves. He is telling us to not overwork ourselves, to go deep in a subject instead of going wide and learning too many things. He is helping us avoid burn out and help us reach our goals.
While I can get a bit impatient and want to move forward faster, I know that I will benefit from Leon’s approach because I need to hear these positive takes.
Leon has been big on community. We need a community to learn and collectively rise up. He isn’t tolerating any bullshit from people and is happy to ban any people who are disrespectful toward others. I think this is part of the reason I say this program is the real deal. Leon is so authentic in wanting to help us and following through. But I know I’m ready to contribute my part. If anyone needs help and I can help, I’m know I won’t hesitate.
One of the first things that Leon had the cohort do is to say “I am a software engineer.” Get rid of the words junior and aspiring from your vocabulary.
I am a software engineer.
While you’re at it, tell your mom, your friends, the person delivering your food. Post it on all your social media. Tell everyone.
This program is going to help us make our dreams not stay dreams. When we all get great paying jobs at the end of the 30 weeks, we’re going to turn around and help someone achieve the same.
I don’t think this is going to be easy. I don’t believe that someone is just going to hand me a job if I hang in there and simply watch the streams every week.
This is going to be hard work. It’s going to be a lot of work. And its going to be worth it. I hope you join me in the rest of the 30 weeks.
I can do this. I’m ready.
Notion
One tool I’m depending on heavily is Notion.
While I’m still actively using the templates for Goodnotes I created on this post, I’m using them as my day-to-day check-in. Almost as a way to ground myself before starting my day or reflection before going to bed.
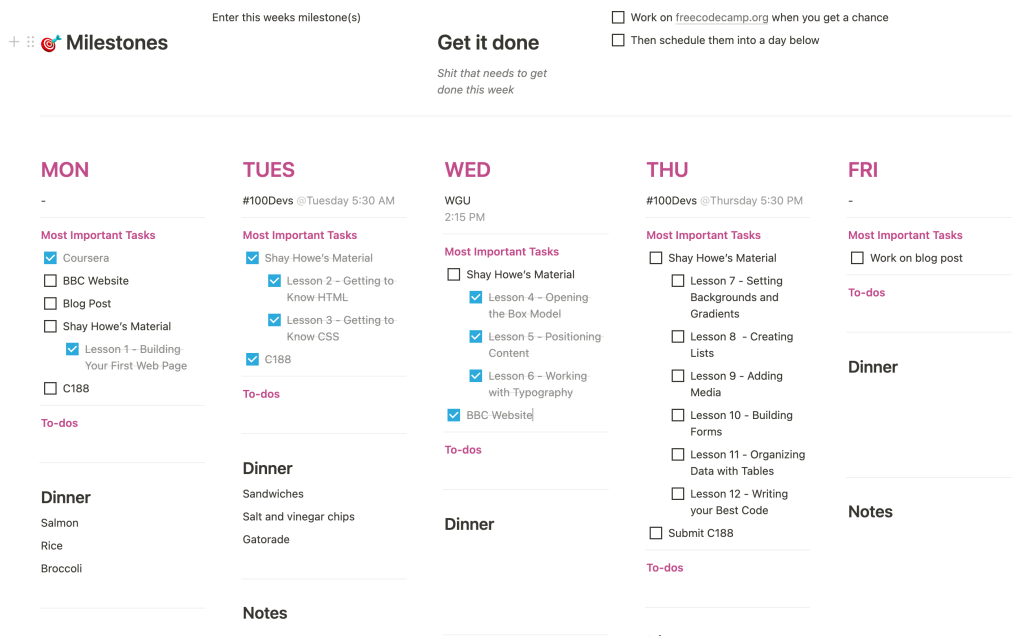
On Notion, I created a weekly template that I plug into a master calendar. It looks a little like this:
It looks chaotic but it works for me. I’m still finding ways to tweak it and customize it to my workflow, but so far so good. I can create a to-do list and try to plan my week ahead of time, but I also have the ability to move things around for when I may not have the energy to really do anything. After all, the name of the game is self-care, right?
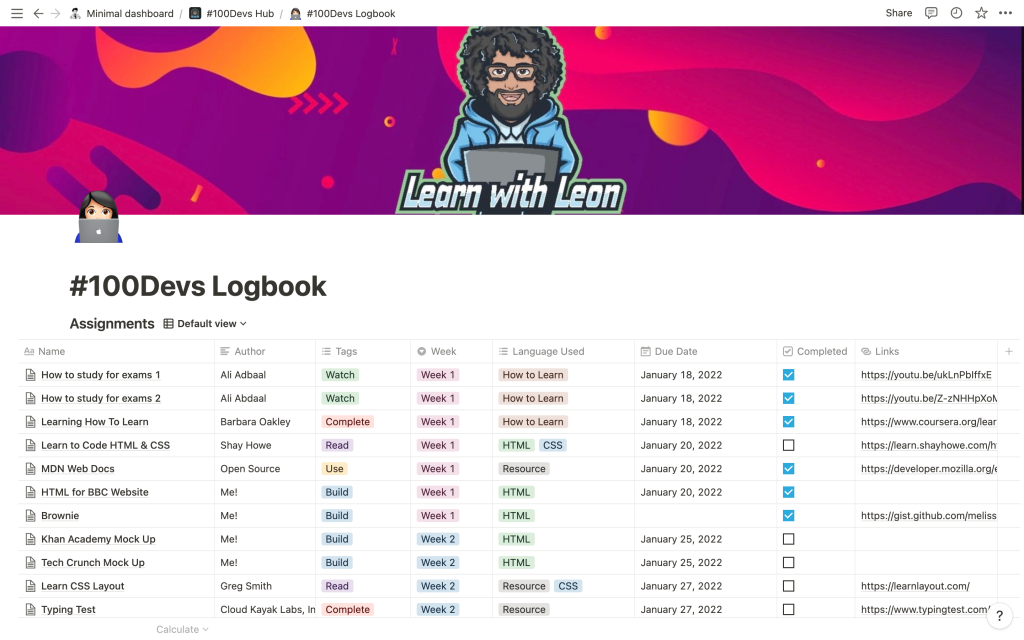
I also created a logbook because I have the tendency to downplay any accomplishments of mine or trick myself into believing that I didn’t actually do anything,
It’s a way for me to keep track of all the assignments and homework that Leon assigns with information like when it’s due, any links provided, and organized by tags that indicate what they are:
An article I have to read
Code I have to build
Something I have to complete, like a typing test or online course
Video I have to watch
What’s Next
For the next couple of weeks, there are a few things I want to focus on:
I’m going to figure out a way to share my progress in my code. Probably codepen, maybe GitHub. I’m going to tinker with that and report with the method I like best.
Leon mentioned that we should start coffee chats soon with people in the industry. This part of the program makes me a little nervous because I’m not the best at putting myself out there socially. But, like any skill, I just have to practice and just do it.
I know that I’m going to depend on the support of others. I might get stuck with my code or just have a bad mental health period. The discord communities and the people I’ve connected with are going to be crucial in my journey and in my success. But I’m ready.
This guide will give you everything you need to know to begin using digital stickers.
Before I even started using my digital planner, I would see Tik Toks and Pinterest posts of different ways that people used their own digital planners. From keeping their daily schedule to habit trackers and daily journals, the possibilities are endless. What caught my eye the most was how people expressed their creativity with images and doodles!
It was only when I started using my own digital planner every day that I realized how I can also make my own stickers or even support other artists by incorporating stickers they created.
First things first: what are digital stickers?
Digital stickers are digital images that you can import into your digital planner, journal, or notes. (I know, I know: how many more times can I say digital in that sentence?)
You can use them to decorate your digital journal or planner like you would a regular sticker in a physical notebook. I’ve seen some users create digital stickers to improve the school notes they take digitally!
There are two different files formats that you can use to make your digital stickers- JPEG and PNG. So what is the difference?
JPEG
With a JPEG file, the image that you import will have a background. Depending on the application you are using, there are ways that you can crop the background. If the application you want to use does not have the option to crop JPEG files, then PNG files with a transparent background might be the way to go.
PNG
On the other hand, PNG files have the option to already come with a transparent background. That means that when you import the image, it’s ready to use and place wherever you want. Personally, I prefer this format because it is easier to use on all levels.
You can use JPEG and PNG files on desktops, laptops, and mobile devices and therefore use digital stickers in vastly different ways. However, this guide is ideal for users with an iPad and a stylus of choice.
Why use digital stickers?
That’s a great question. There are huge advantages to using digital stickers over physical stickers:
You don’t have to experience sticker anxiety.
You know that irrational fear of using physical stickers because what if it’s not the rightplace for your sticker? What if you find a better spot for it later, but now it’s too late because you already used it? And before you know it, you have sheets and sheets of stickers that you’ve collected over the years but never found the perfect spot for. And probably never will…
Digital stickers are more forgiving.
Digital stickers are more forgiving because you can reuse them over and over. On the other hand, once you use a physical sticker, you won’t be able to use it again unless you buy the same sticker again.
You can resize them or move them around. If you decide that you actually don’t want that sticker, you can just delete it instead of struggling to remove it like you would physical stickers.
You can express your creativity.
If you are already using a digital planner or a digital journal, using digital stickers is an easy way to express your creativity and individuality. Sure, stickers can be useful and practical, but they can also be cute and unique!
Where can I use digital stickers?
You can use digital stickers on any platform or application that allows you to insert a file or image files. Applications like GoodNotes, Notability, Google Docs, and Google Slides. I’m sure there are plenty more to add to this list.
My preferred application is GoodNotes because I can use my stickers on school notes, my daily planner, or any other digital notebook I have in the application.
Where can I find digital stickers?
There are two main ways you can get digital stickers:
You can support artists who have them for sale on websites like Etsy or Gumroad.
You can create them yourself!
Sometimes artists have freebies on their websites that you can download as well! I created a free sticker pack that you can download here. It’s a sticker pack that includes 8 png files and a .goodnotes sticker sheet if you want to explore the different ways you can import digital stickers to your application.
In terms of making digital stickers, there really is no ‘best way’ or ‘right way.’ There are a ton of options and programs, you just have to find your favorite way or one that fits best with your workflow. Some programs include (but are definitely not limited to): Canva, Photoshop, Illustrator, and Procreate.
Canva
Canva is a web-based graphic design that has exploded in popularity recently. It has a free version that anyone can sign up for and Canva Pro, for those who want more advanced tools and more content.
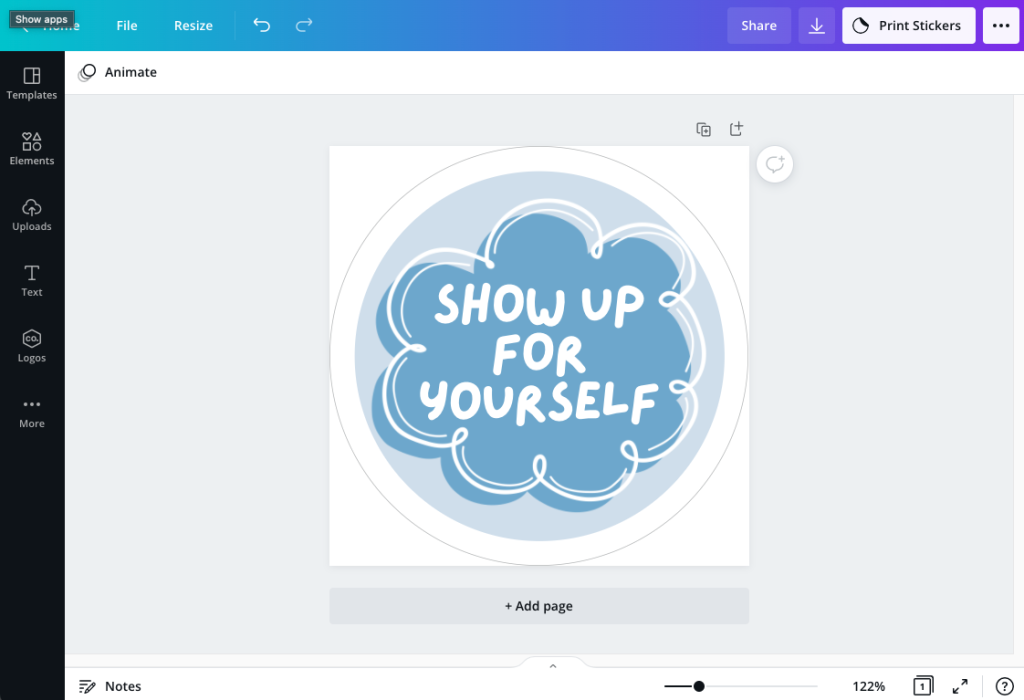
Canva does have some templates for stickers that you can edit, or you can create your design from scratch.
Once you’re happy with your design, it’s time to export it.
Canva on a laptop or desktop: If you’ve used a sticker template, your design will have a download button with a downward-facing arrow right next to the ‘Print Stickers’ button on the top right corner.
Once you click on that arrow, you can select the file type. Both Canva and I suggest using PNG because it then gives you the option to select “Transparent Background.” That way, you can import your design and it will be ready to use!
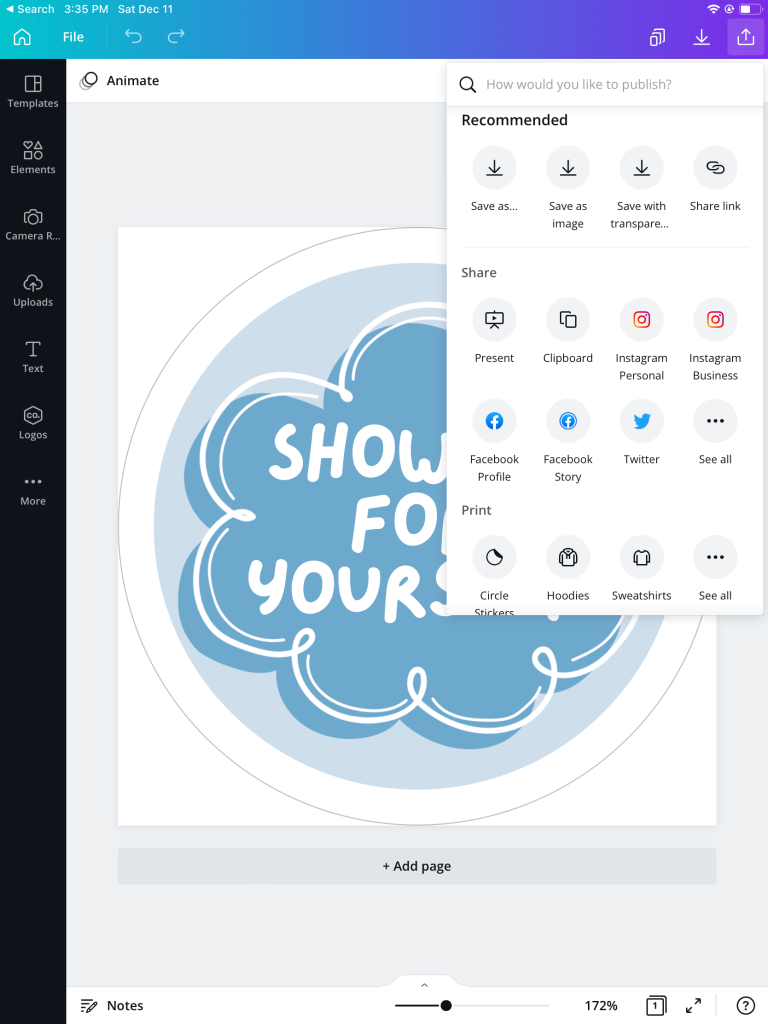
Canva on the iPad: If you are using Canva on the iPad, the steps are slightly different.
You can click on the downward-facing arrow in the top right corner, but it will automatically download the file. If you click on the Share button located on the same corner (the button with the upward-facing arrow), then you will see options like ‘Save as’ and ‘Save with transparent background.’
How to import digital stickers
Once you have your PNG file ready to go, you can import it into your program of choice. While steps to import the stickers may be slightly different depending on the program, most of them follow a similar process.
Drag and Drop
The drag and drop method works best if you use multitasking on the iPad. You can either use Split View, where two apps are side by side, or Slide Over, where one app appears as a floating window that you can drag to the left or right of your screen. The two apps you want when multitasking are the app where you want to place your digital sticker and the Files app, open to where your file is located.
Once you have the individual PNG or JPEG file located, follow these steps:
Long-press on the image and drag it over to your document.
Release the sticker and resize, rotate, and move as desired.
Copy and Paste
If the app that you want to use doesn’t support the drag and drop function, you can copy the image and paste it inside the program:
Open the image in the Files app and tap the Share icon.
Select Copyfrom the options.
Open the application you wish to use, tap and hold anywhere, and select Paste.
Insert or Import
In some programs, like Google Docs, you can insert an image from the menu bar. This also might vary by program, but generally, you can use the following steps:
Click on Insert in the Menu bar
Select Image
Select Upload from Computer
Locate the file in your computer
Goodnotes
Sticker book and Elements
For GoodNotes specifically, there are additional ways to add stickers.
Import a sticker book: A sticker book or sticker sheet is essentially a .goodnotes file with images that are ready for you to use. This means that instead of importing each individual file, you only have to import one file to access all the stickers in that book.
To import the GoodNotes file, you start on the main page of your GoodNotes app.
Click on the blacnk rectangle, captioned “New…”
Select “Import” from the drop down menu
Select the .goodnotes file that you want to open.
Once the import is done, you can reference the sticker book as many times as you want.
These are the steps to use a specific image:
Select it using the lasso tool.
Once selected, tap on the image.
It will then give you various options in a pop-up bar, like ‘Cut’, ‘Copy’, and ‘Add Element’.
Select ‘Copy.’
Navigate to the page where you want to place this image.
Touch and hold on the spot where you want to place the image, until the same pop-up bar appears, giving you the option to ‘Paste.’
Select ‘Paste.’ Resize and move your new sticker as desired.
Elements: GoodNotes also has a feature called elements that makes it even easier to use and manage your stickers. From this tool, you can access and import your stickers, instead of having to navigate to a different notebook or sheet.
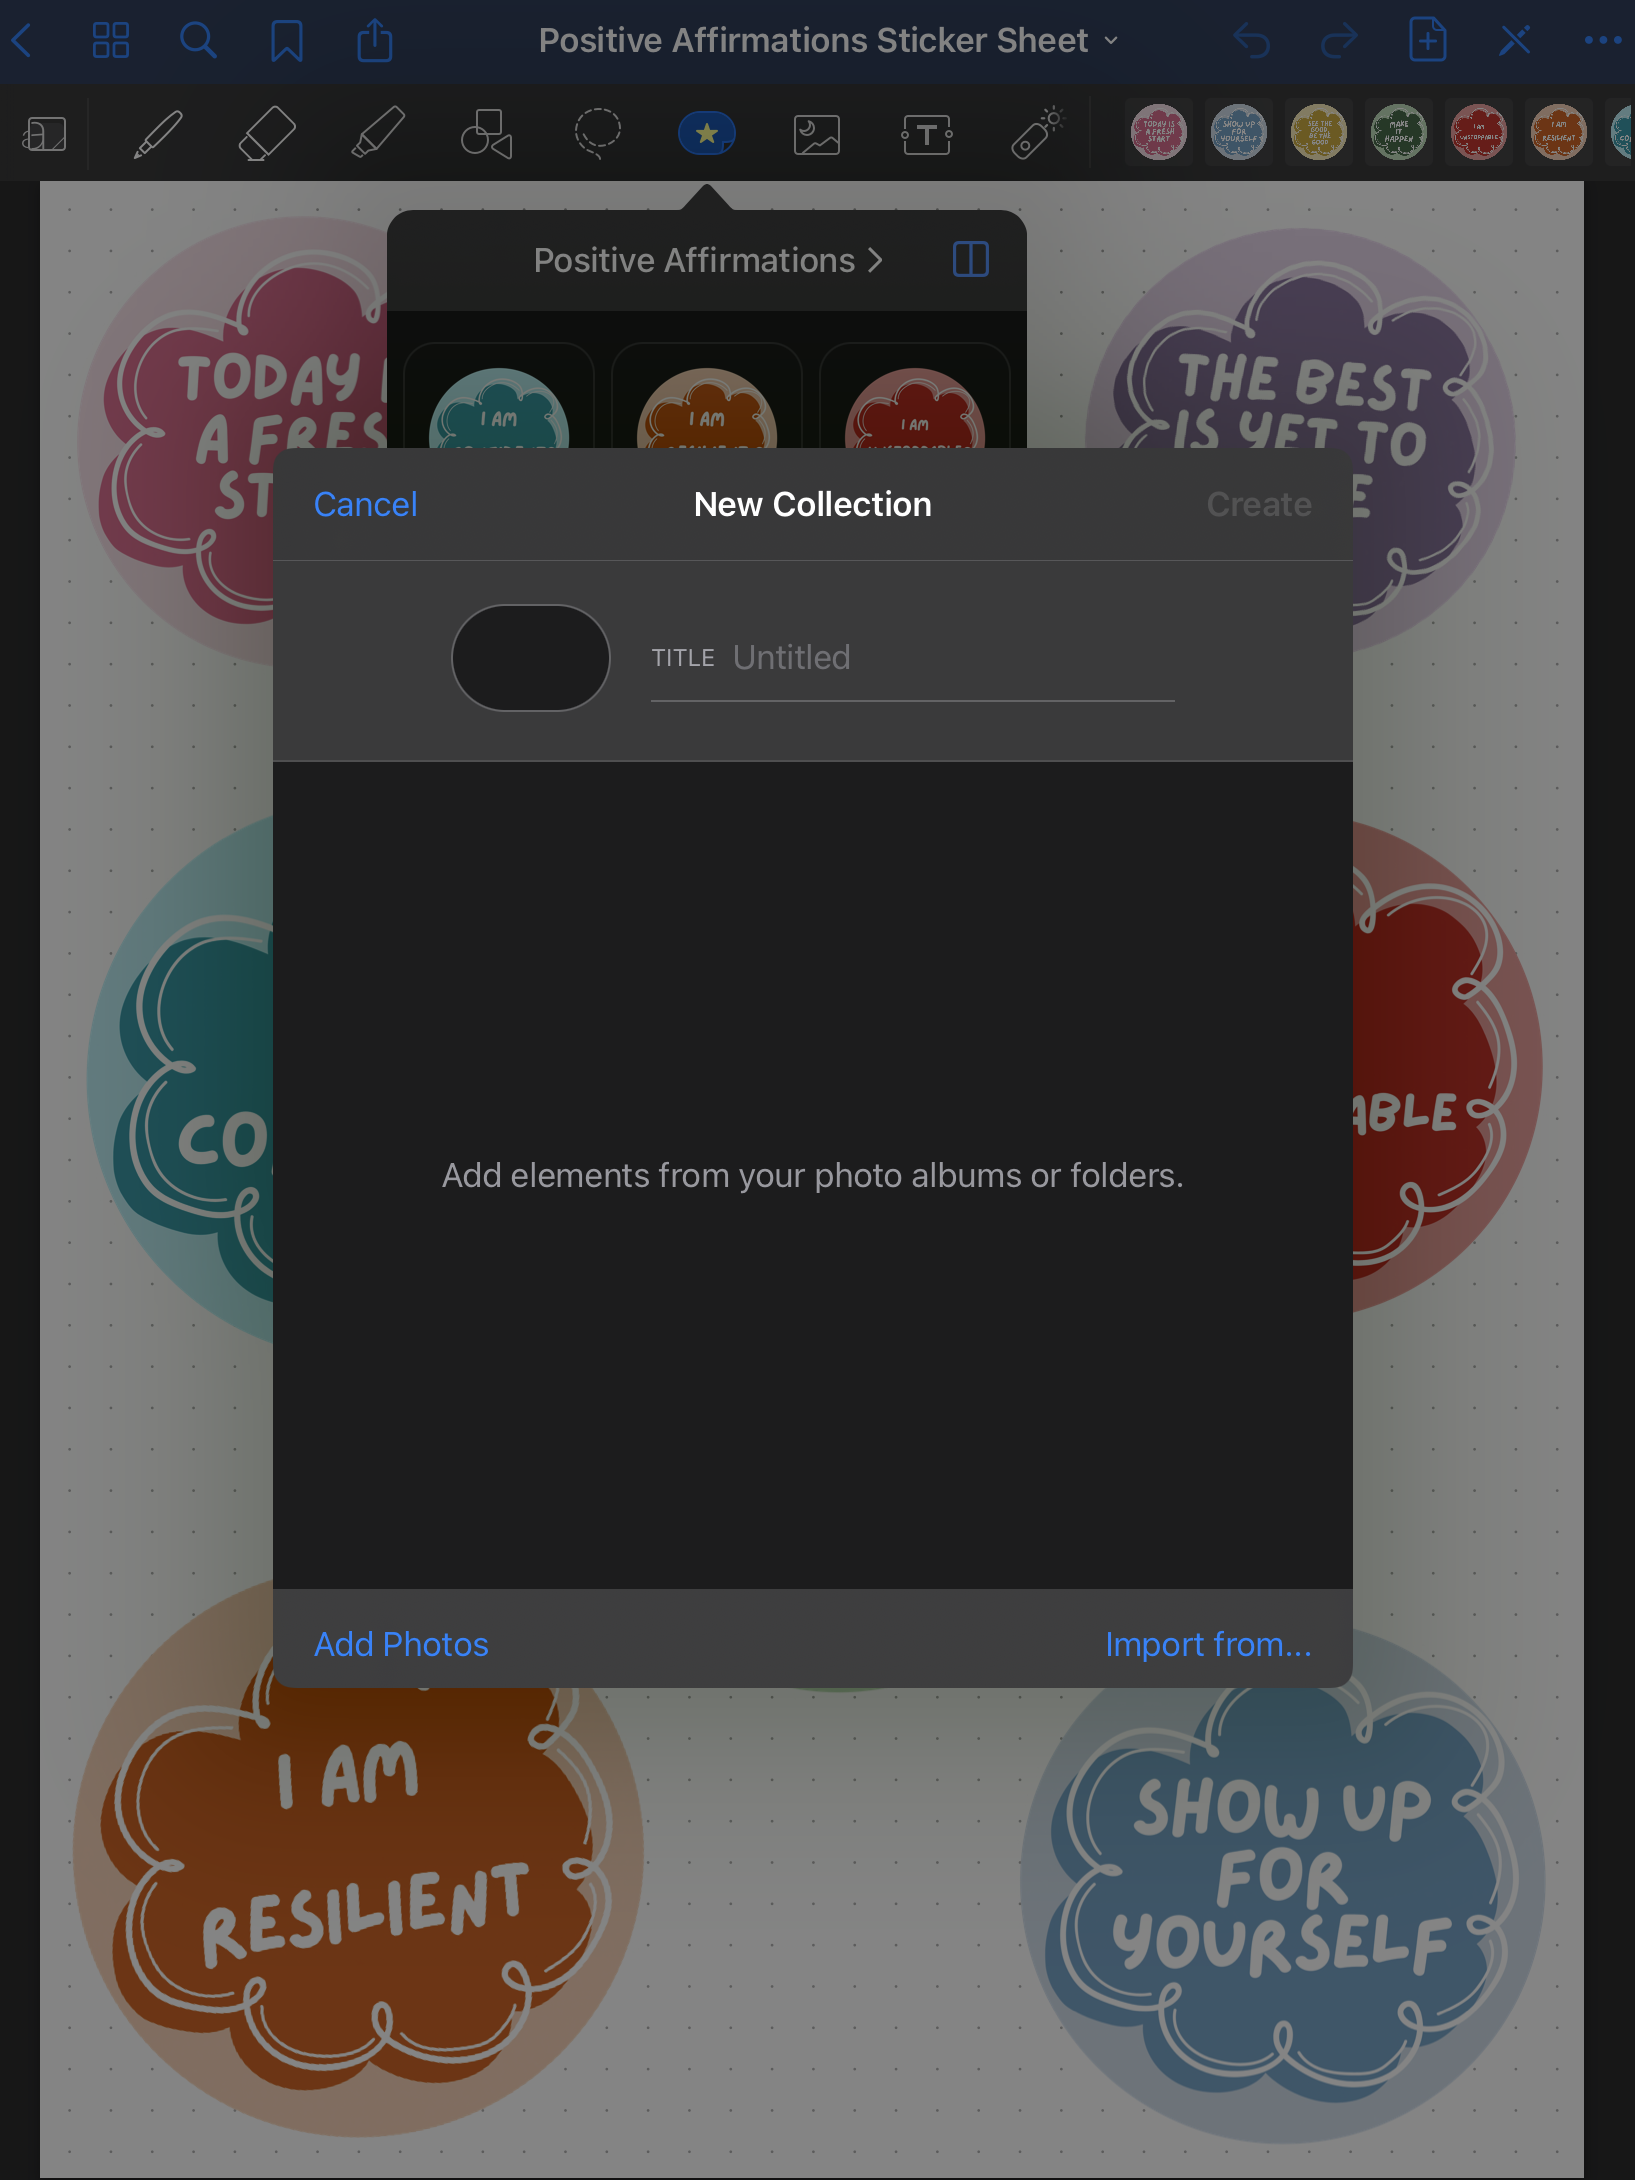
The elements tool is on the right side of the lasso tool. When in use, it looks like a blue oval with a yellow star in the middle as pictured below.
If you select an image using the lasso tool, you can also tap it and ‘Add element’ from there. Once you do that, you can access that sticker from any notebook in the application without having to navigate back to the sticker sheet.
When you click on the element tool, the bottom right-hand corner of the window that pops up also lets you create a new collection of stickers by importing them from your files.
When you click on ‘Import from…’ it will let you select the png or jpeg file you want to add to the collection. This is a good method if you do not have (or prefer not to use) a sticker book or sheet.
Conclusion
Thank you for reading my beginner’s guide to digital stickers! They’re a fun tool to use if you want to personalize a digital planner or even some school notes. Even creating stickers can be a fun creative outlet!
I last posted two weeks ago and then I feel like everything got out of whack. Since lockdown began in March 2020, I have not gotten COVID. But I got one sinus infection and it almost took me out. I was out of commission and miserable for almost two weeks, on a steady diet of medicine and Sprite.
Now that I’m feeling human again, I’m trying to get back on track with my studies and the other side projects. I’m constantly telling myself that it’s ok that I didn’t get much done because my body needed the rest. it’s been working- for the most part. I think that a huge reason why I’m not being so harsh on myself is that I’m excited about learning new things.
I started a new class that is teaching python. Well, technically it’s a class on data structures and algorithms. But I’ve never really learned python officially, so I’m excited to start on this class. Maybe I’ll post some python notes or tutorials here one day.
I have also been diving into the world of digital planners. As I mentioned before, one tool I’m using to establish a routine is a daily template that I fill out either every morning or the night before. This allows me to touch base with my goals, my chores, my self-care, without putting too much pressure on myself to plan every minute of the day.
I’ve used the app GoodNotes on and off since version number 4. I’m in love with their new elements feature and how easy it is to make digital stickers that I can use throughout the notebooks I’ve created in the app. I tried to use other apps like Notability, but personally, I prefer the overall experience of GoodNotes.
As someone who is trying to improve her writing, tech skills, and overall self-development, I want to post a tutorial on how I am able to create new digital stickers for digital planning. Stay tuned!
I don’t remember exactly where it came from, but I used to think that in order to change my life, I need to get up at the crack of dawn, workout, and then go about my day. Now, I’m sure that people who do that on the regular have their life together and can talk about all the positives that result from their routine.
However, I am not one of those people. I am not a morning person by any stretch of the imagination. If I had a super early shift, sure, I would get up because I have an external obligation and a strong sense of responsibility. But to do it daily for no outward reason? Not me.
The problem was that I went through phases where I convinced myself that I HAD to be that person. This only resulted in major disappointment and some unhealthy negative thoughts about myself. I thought there was something wrong with me because I couldn’t get my act together and become a morning person.
In retrospect, I did three things that didn’t mix well:
I tried to force myself into a little box- the archetype of a productive morning person.
I didn’t let myself adjust- I tried going cold turkey from one lifestyle to another.
I wasn’t very forgiving toward myself.
I literally set myself up for failure. Not everyone can be morning people and that’s totally ok! I have to find a way to work with my actual self and not some impossible ideal I set up for myself.
Right now that I’m currently funemployed, I’ve had a chance to experiment on establishing some sort of routine. I’m not saying that I’ll fully become a morning person, but if I have the right tools and give myself enough time, maybe I will? I’m open to the possibilities.
What I am trying to keep in mind while I’m experimenting:
I’m not trying to make the same mistakes as last time.
I want to focus on making sure that I ease into any new habits I want to build.
This isn’t going to happen overnight.
My Templates
My favorite professor once tried to give me some advice. He said that instead of looking at something as one big task, I should break it up into different steps and make them more manageable to avoid feeling overwhelmed. When he told me this, I was stubborn and thought I was Supergirl- I can continue with the same bad habits and still succeed! Spoiler alert: that’s not what happened.
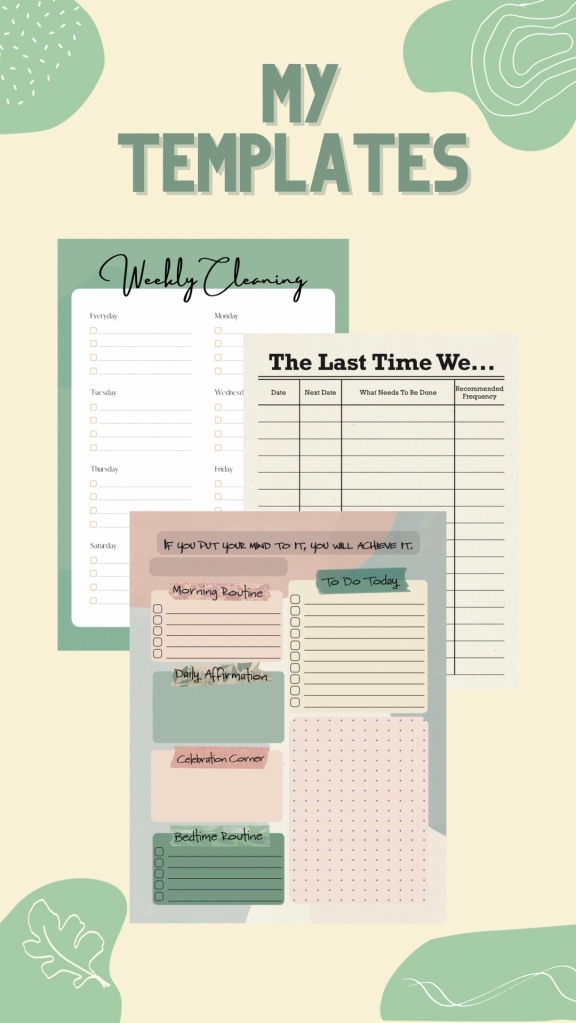
In an effort to incorporate his advice, I created three templates that can help me break up different tasks that I get overwhelmed by and also keep track of them. The templates are of a daily planner, a weekly clean up checklist, and a template where I can keep track of when my big ticket appliances were last cleaned. To be completely honest, I am extremely proud of them because not only did I have a chance to use my creative muscles in my favorite program (InDesign!), they also are very functional.
The Daily Planner
I have tried different forms of planners in my lifetime. Most recently, I tried the old reliable notebook and pen. I went this route because I don’t like the idea of keeping a journal or planner on a computer but I also didn’t want to waste a ton of paper by printing out a template everyday. Since I’m journaling everyday, why not just include it there? So everynight, I would write out my layout for the next day. At first, I didn’t mind the task, but eventually, my brain started considered it a chore and I avoided journaling all together.
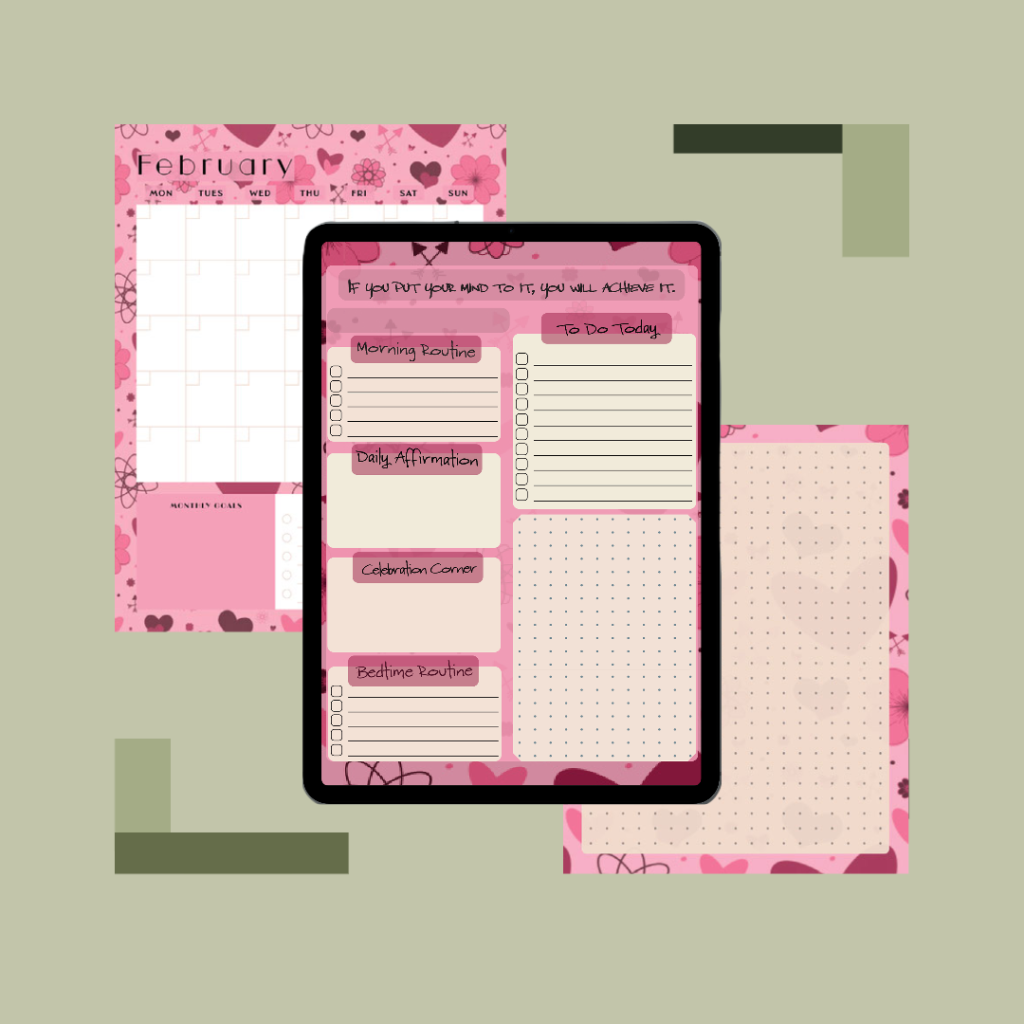
This time around, I created a template that I use to check in with myself everyday. I uploaded it to Good Notes and use my iPad and Apple Pencil to write in it instead of typing anything. Best of both worlds.
This template is fairly simple. Sure, I made it in a color scheme that I like and added some cute elements like washi tape and a cool background. But I think the sections themselves are very flexible.
Instead of a schedule block with time increments, I incorporated a to-do list. In the past, if I didn’t end up following my overly optimistic schedule, I would carry around guilt and feel bad for the rest of the day. If I’m lucky, I didn’t carry those negative feelings to another day. So I thought, why even give myself a chance to feel bad? Let’s stick to the basics. I’ll write down what I need to get done and prioritize them, but I won’t force myself into thinking that I need to get it done during a specific time.
I also excluded any habit trackers. These would include sections that keep track of water consumptions, any food planning or exercise, or any activity I want to do everyday. I didn’t want to fall into the pit of keeping track of the same habit in different ways because that would just add to my mental workload. I figured that if I wanted to start using habit trackers, I can use one of the multitude of options that exist in the App Store without adding it onto the daily template.
I made sure to include the sections ‘Daily Affirmation’ and ‘Celebration Corner’ for my mental health. Since I would like to work more on my positive thinking (or lack thereof), I want to start the day by writing down a positive affirmation. Right now, I am using the app “I Am” to get a new positive affirmation everyday. I find the app very useful because they have a widget where I can see the affirmation throughout the day. I can still keep it fresh in my mind without having to constantly pull out my planner.
With that line of thinking, I included ‘Celebration Corner’ because I wanted to create a section where I gave myself permission to celebrate anything I’m proud of or grateful for that day. It can be very easy for me to talk negatively about myself. I find that sometimes that feeling can linger for a few days, weeks, or even months. So I’m flipping the script and making it a habit to celebrate myself. So far, I’ve included things like a picture of a delicious Buffalo Chicken Stromboli I made or the fact that I created the templates.
There are two sections, morning and bedtime routine, that I included to write down the self-care actions I want to prioritize. As much as I hate to admit it, I know some days I’ve felt so overly sad or overwhelmed that I can’t even gather the energy to take care of myself in the most basic of ways, like to washing my face or brushing my teeth.
I left them as a blank checklist so that they are flexible depending on my energy levels and mental health.
Cleaning Templates
One thing that consistently overwhelms me is cleaning. When I start that mental list of chores that need to be done, it quickly spirals into 20 more things. ‘If I do this one thing, then I have to do this other thing. And I also have to do this.’ It easily gets out of control and I end up not doing anything for a few days.
When this happens, then all the cleaning ends up falling into one random day. This leaves me with no time or energy to do anything else on that day. It is not a fun cycle.
In an effort to incorporate my professor’s advice one more, I created the ‘Weekly Cleaning Checklist’ and the template I call ‘The Last Time We…’.
The ‘Weekly Cleaning Checklist’ is split up into the 7 days of the week plus an ‘Everyday’ section. To start off, I only have two things that I want to do everyday: the dishes and sweeping. As a dog ower, sweeping is essential! Then I assigned one room of my apartment to one weekday, but still leaving one day open. That way, we can focus on one or two things on the weekend and not spend it cleaning all day.
For example, on Monday, I focus on the kitchen and the everyday chores. If other cleaning does get done, fantastic. But if it doesn’t, then it’s ok, I’ll worry about the living room on Thursday and the bathroom on Friday.
I also wanted to keep track of any of the ‘big ticket’ appliances that need deep cleaning everyonce in a while but not every week. I would try to keep a mental list of when we last deep cleaned an item, but I would very quickly forget when that was and when it needs to be done again.
I made this template to look like an old school library checkout card because it made me happy. I had sections that tell me what needs to be done, when I last did it and the recommended date of when to do it next. This helps me alleviate the mental guilt of not knowing when I last ran the cleaning cycle on my washer and not knowing when I need to do it next. I also included a section that indicates the recommended frequency, so I don’t trap myself into a rigid schedule.
Next steps
I know this isn’t the end of my experiment. In fact, it’s barely the beginning. I eventually want to incorporate exercise into my routine, but I need to work on how I think about exercise. As with other things, feeling like I need to workout instead of wanting to workout for my physical and mental health makes my brain not want to do it. So I come up with every excuse under the sun to put it off.
But I can’t wait until I’m ready, otherwise I’ll never do it.
Do you have a routine? What works for you? Let me know!
Hi, my name is Melissa. I’ve wanted to start a blog for a very long time. But I never took the plunge because I convinced myself that I didn’t have anything of value to say. I silenced myself before I even started. Fast forward 10 years, I continue to hold onto the belief that I don’t have anything valuable to contribute.
This self-doubt bled over into other things I’ve wanted to pursue. It’s gotten to the point where I feel like I’m stuck and that feeling is now seemingly permanent.
Can I tell you a (not-so-well-kept) secret? I’m so tired of feeling stuck.
So I’m jumping in feet first. I’m committing myself to be bolder in my actions toward life. I’m doing this for me and for my mental health. Hell, even for my physical health. I’m documenting my journey even though I have no idea what I’m doing. I’m also doing this because I hope this can help others who are experiencing this same feeling. Even if this helps only one person, I would be so happy. And if that one person is me, that’s ok too.
Why the bold dev?
I did stress a lot over the name of the blog. Some bloggers say that the name isn’t as important, but I’m definitely the type to (over!) think about something until I deem it perfect.
In an effort to change that pattern, I tried to adopt a ‘fuck it’ mentality. I was going to go with the name action & motivation because I thought those two words perfectly summarise the journey I’m trying to take. Some of my other ideas were Jumping Feet First,Think Outside Your Comfort Zone, and Leaving the Sidelines. But I gave myself 24 hours to really let it marinate before I bought the domain.
In those 24 hours, I came up with the bold dev. That name excited me the most because, at the end of the day, it’s who I want to be. I want to be bolder, I want to have the courage to pursue anything I put my mind to. I’m seeking personal growth and development so that I don’t feel like I’m stuck anymore. I’m also currently working toward my degree in computer science, so being a developer is a long-term goal of mine.
Here is a general idea of topics that you will see here and projects that I want to pursue:
Mental health
Establishing a morning routine
Starting a blog
Becoming more active
Making digital art and art in general
Earning my degree in computer science
Cryptocurrency and NFTs
Animal Crossing and Pokemon
My two dogs, Balto and Buster
Before I overwhelm myself with all these ideas running through my head, I am committing to this blog and taking it one step at a time. I’ve accepted that it will probably read more like a journal at first but I’m excited to see where it takes me and how it changes over time.
I Got This
I don’t think this is going to be easy by any means. But I’m hoping that it will be worth it. Because it’s scary putting myself out there, especially in a format that is new to me. But you know what’s even scarier?
Having another 10 years pass and still feeling like I’m stuck.