

This guide will give you everything you need to know to begin using digital stickers.
Before I even started using my digital planner, I would see Tik Toks and Pinterest posts of different ways that people used their own digital planners. From keeping their daily schedule to habit trackers and daily journals, the possibilities are endless. What caught my eye the most was how people expressed their creativity with images and doodles!
It was only when I started using my own digital planner every day that I realized how I can also make my own stickers or even support other artists by incorporating stickers they created.
First things first: what are digital stickers?
Digital stickers are digital images that you can import into your digital planner, journal, or notes. (I know, I know: how many more times can I say digital in that sentence?)
You can use them to decorate your digital journal or planner like you would a regular sticker in a physical notebook. I’ve seen some users create digital stickers to improve the school notes they take digitally!
There are two different files formats that you can use to make your digital stickers- JPEG and PNG. So what is the difference?
JPEG
With a JPEG file, the image that you import will have a background. Depending on the application you are using, there are ways that you can crop the background. If the application you want to use does not have the option to crop JPEG files, then PNG files with a transparent background might be the way to go.
PNG
On the other hand, PNG files have the option to already come with a transparent background. That means that when you import the image, it’s ready to use and place wherever you want. Personally, I prefer this format because it is easier to use on all levels.
You can use JPEG and PNG files on desktops, laptops, and mobile devices and therefore use digital stickers in vastly different ways. However, this guide is ideal for users with an iPad and a stylus of choice.
Why use digital stickers?
That’s a great question. There are huge advantages to using digital stickers over physical stickers:
You don’t have to experience sticker anxiety.
You know that irrational fear of using physical stickers because what if it’s not the right place for your sticker? What if you find a better spot for it later, but now it’s too late because you already used it? And before you know it, you have sheets and sheets of stickers that you’ve collected over the years but never found the perfect spot for. And probably never will…
Digital stickers are more forgiving.
Digital stickers are more forgiving because you can reuse them over and over. On the other hand, once you use a physical sticker, you won’t be able to use it again unless you buy the same sticker again.
You can resize them or move them around. If you decide that you actually don’t want that sticker, you can just delete it instead of struggling to remove it like you would physical stickers.
You can express your creativity.
If you are already using a digital planner or a digital journal, using digital stickers is an easy way to express your creativity and individuality. Sure, stickers can be useful and practical, but they can also be cute and unique!
Where can I use digital stickers?
You can use digital stickers on any platform or application that allows you to insert a file or image files. Applications like GoodNotes, Notability, Google Docs, and Google Slides. I’m sure there are plenty more to add to this list.
My preferred application is GoodNotes because I can use my stickers on school notes, my daily planner, or any other digital notebook I have in the application.
Where can I find digital stickers?
There are two main ways you can get digital stickers:
- You can support artists who have them for sale on websites like Etsy or Gumroad.
- You can create them yourself!
Sometimes artists have freebies on their websites that you can download as well! I created a free sticker pack that you can download here. It’s a sticker pack that includes 8 png files and a .goodnotes sticker sheet if you want to explore the different ways you can import digital stickers to your application.
In terms of making digital stickers, there really is no ‘best way’ or ‘right way.’ There are a ton of options and programs, you just have to find your favorite way or one that fits best with your workflow. Some programs include (but are definitely not limited to): Canva, Photoshop, Illustrator, and Procreate.
Canva
Canva is a web-based graphic design that has exploded in popularity recently. It has a free version that anyone can sign up for and Canva Pro, for those who want more advanced tools and more content.
Canva does have some templates for stickers that you can edit, or you can create your design from scratch.
Once you’re happy with your design, it’s time to export it.
Canva on a laptop or desktop: If you’ve used a sticker template, your design will have a download button with a downward-facing arrow right next to the ‘Print Stickers’ button on the top right corner.
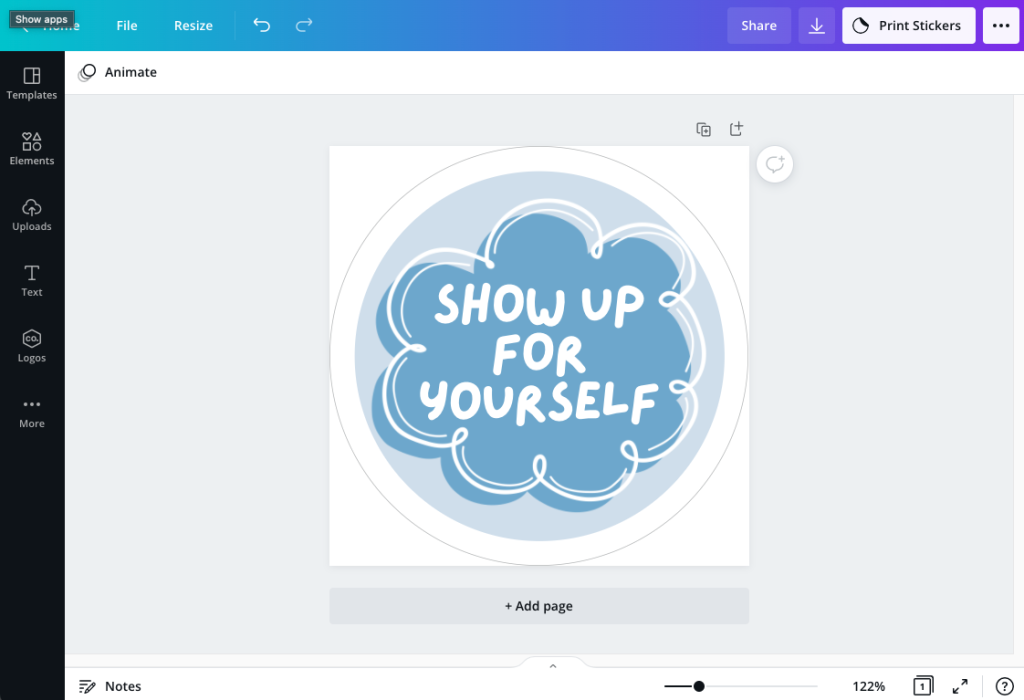
Once you click on that arrow, you can select the file type. Both Canva and I suggest using PNG because it then gives you the option to select “Transparent Background.” That way, you can import your design and it will be ready to use!
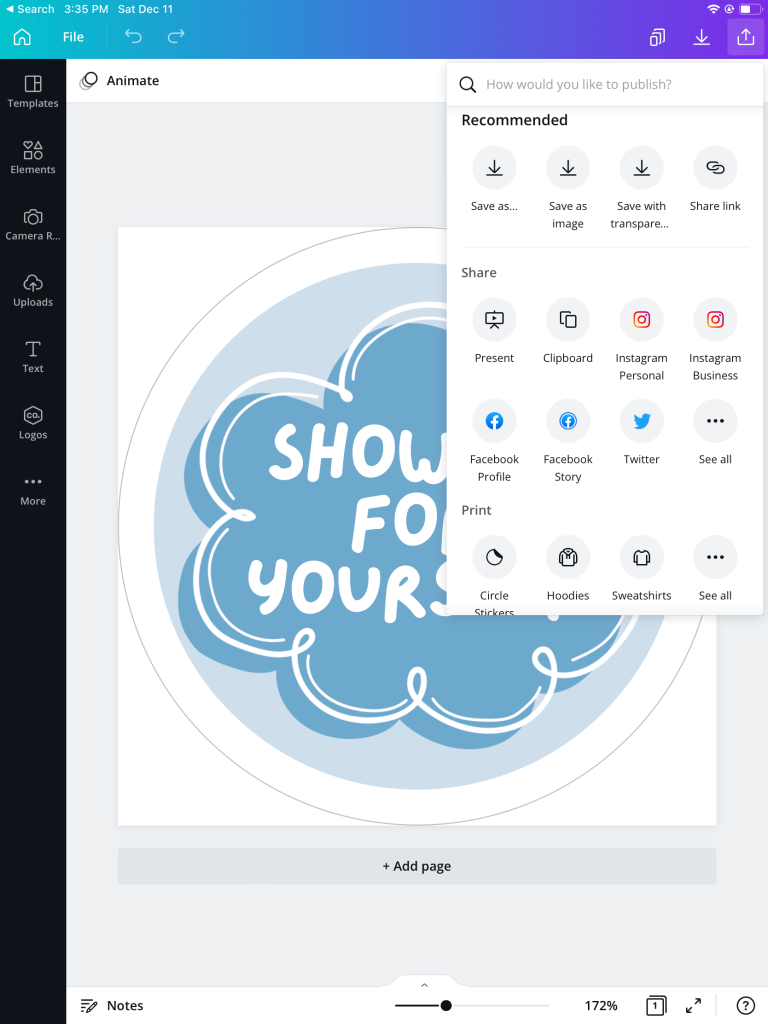
Canva on the iPad: If you are using Canva on the iPad, the steps are slightly different.
You can click on the downward-facing arrow in the top right corner, but it will automatically download the file. If you click on the Share button located on the same corner (the button with the upward-facing arrow), then you will see options like ‘Save as’ and ‘Save with transparent background.’
How to import digital stickers
Once you have your PNG file ready to go, you can import it into your program of choice. While steps to import the stickers may be slightly different depending on the program, most of them follow a similar process.
Drag and Drop
The drag and drop method works best if you use multitasking on the iPad. You can either use Split View, where two apps are side by side, or Slide Over, where one app appears as a floating window that you can drag to the left or right of your screen. The two apps you want when multitasking are the app where you want to place your digital sticker and the Files app, open to where your file is located.
Once you have the individual PNG or JPEG file located, follow these steps:
- Long-press on the image and drag it over to your document.
- Release the sticker and resize, rotate, and move as desired.
Copy and Paste
If the app that you want to use doesn’t support the drag and drop function, you can copy the image and paste it inside the program:
- Open the image in the Files app and tap the Share icon.
- Select Copy from the options.
- Open the application you wish to use, tap and hold anywhere, and select Paste.
Insert or Import
In some programs, like Google Docs, you can insert an image from the menu bar. This also might vary by program, but generally, you can use the following steps:
- Click on Insert in the Menu bar
- Select Image
- Select Upload from Computer
- Locate the file in your computer
Goodnotes
Sticker book and Elements
For GoodNotes specifically, there are additional ways to add stickers.
Import a sticker book: A sticker book or sticker sheet is essentially a .goodnotes file with images that are ready for you to use. This means that instead of importing each individual file, you only have to import one file to access all the stickers in that book.
To import the GoodNotes file, you start on the main page of your GoodNotes app.
- Click on the blacnk rectangle, captioned “New…”
- Select “Import” from the drop down menu
- Select the .goodnotes file that you want to open.
Once the import is done, you can reference the sticker book as many times as you want.
These are the steps to use a specific image:
- Select it using the lasso tool.
- Once selected, tap on the image.
- It will then give you various options in a pop-up bar, like ‘Cut’, ‘Copy’, and ‘Add Element’.
- Select ‘Copy.’
- Navigate to the page where you want to place this image.
- Touch and hold on the spot where you want to place the image, until the same pop-up bar appears, giving you the option to ‘Paste.’
- Select ‘Paste.’ Resize and move your new sticker as desired.
Elements: GoodNotes also has a feature called elements that makes it even easier to use and manage your stickers. From this tool, you can access and import your stickers, instead of having to navigate to a different notebook or sheet.
The elements tool is on the right side of the lasso tool. When in use, it looks like a blue oval with a yellow star in the middle as pictured below.

If you select an image using the lasso tool, you can also tap it and ‘Add element’ from there. Once you do that, you can access that sticker from any notebook in the application without having to navigate back to the sticker sheet.
When you click on the element tool, the bottom right-hand corner of the window that pops up also lets you create a new collection of stickers by importing them from your files.
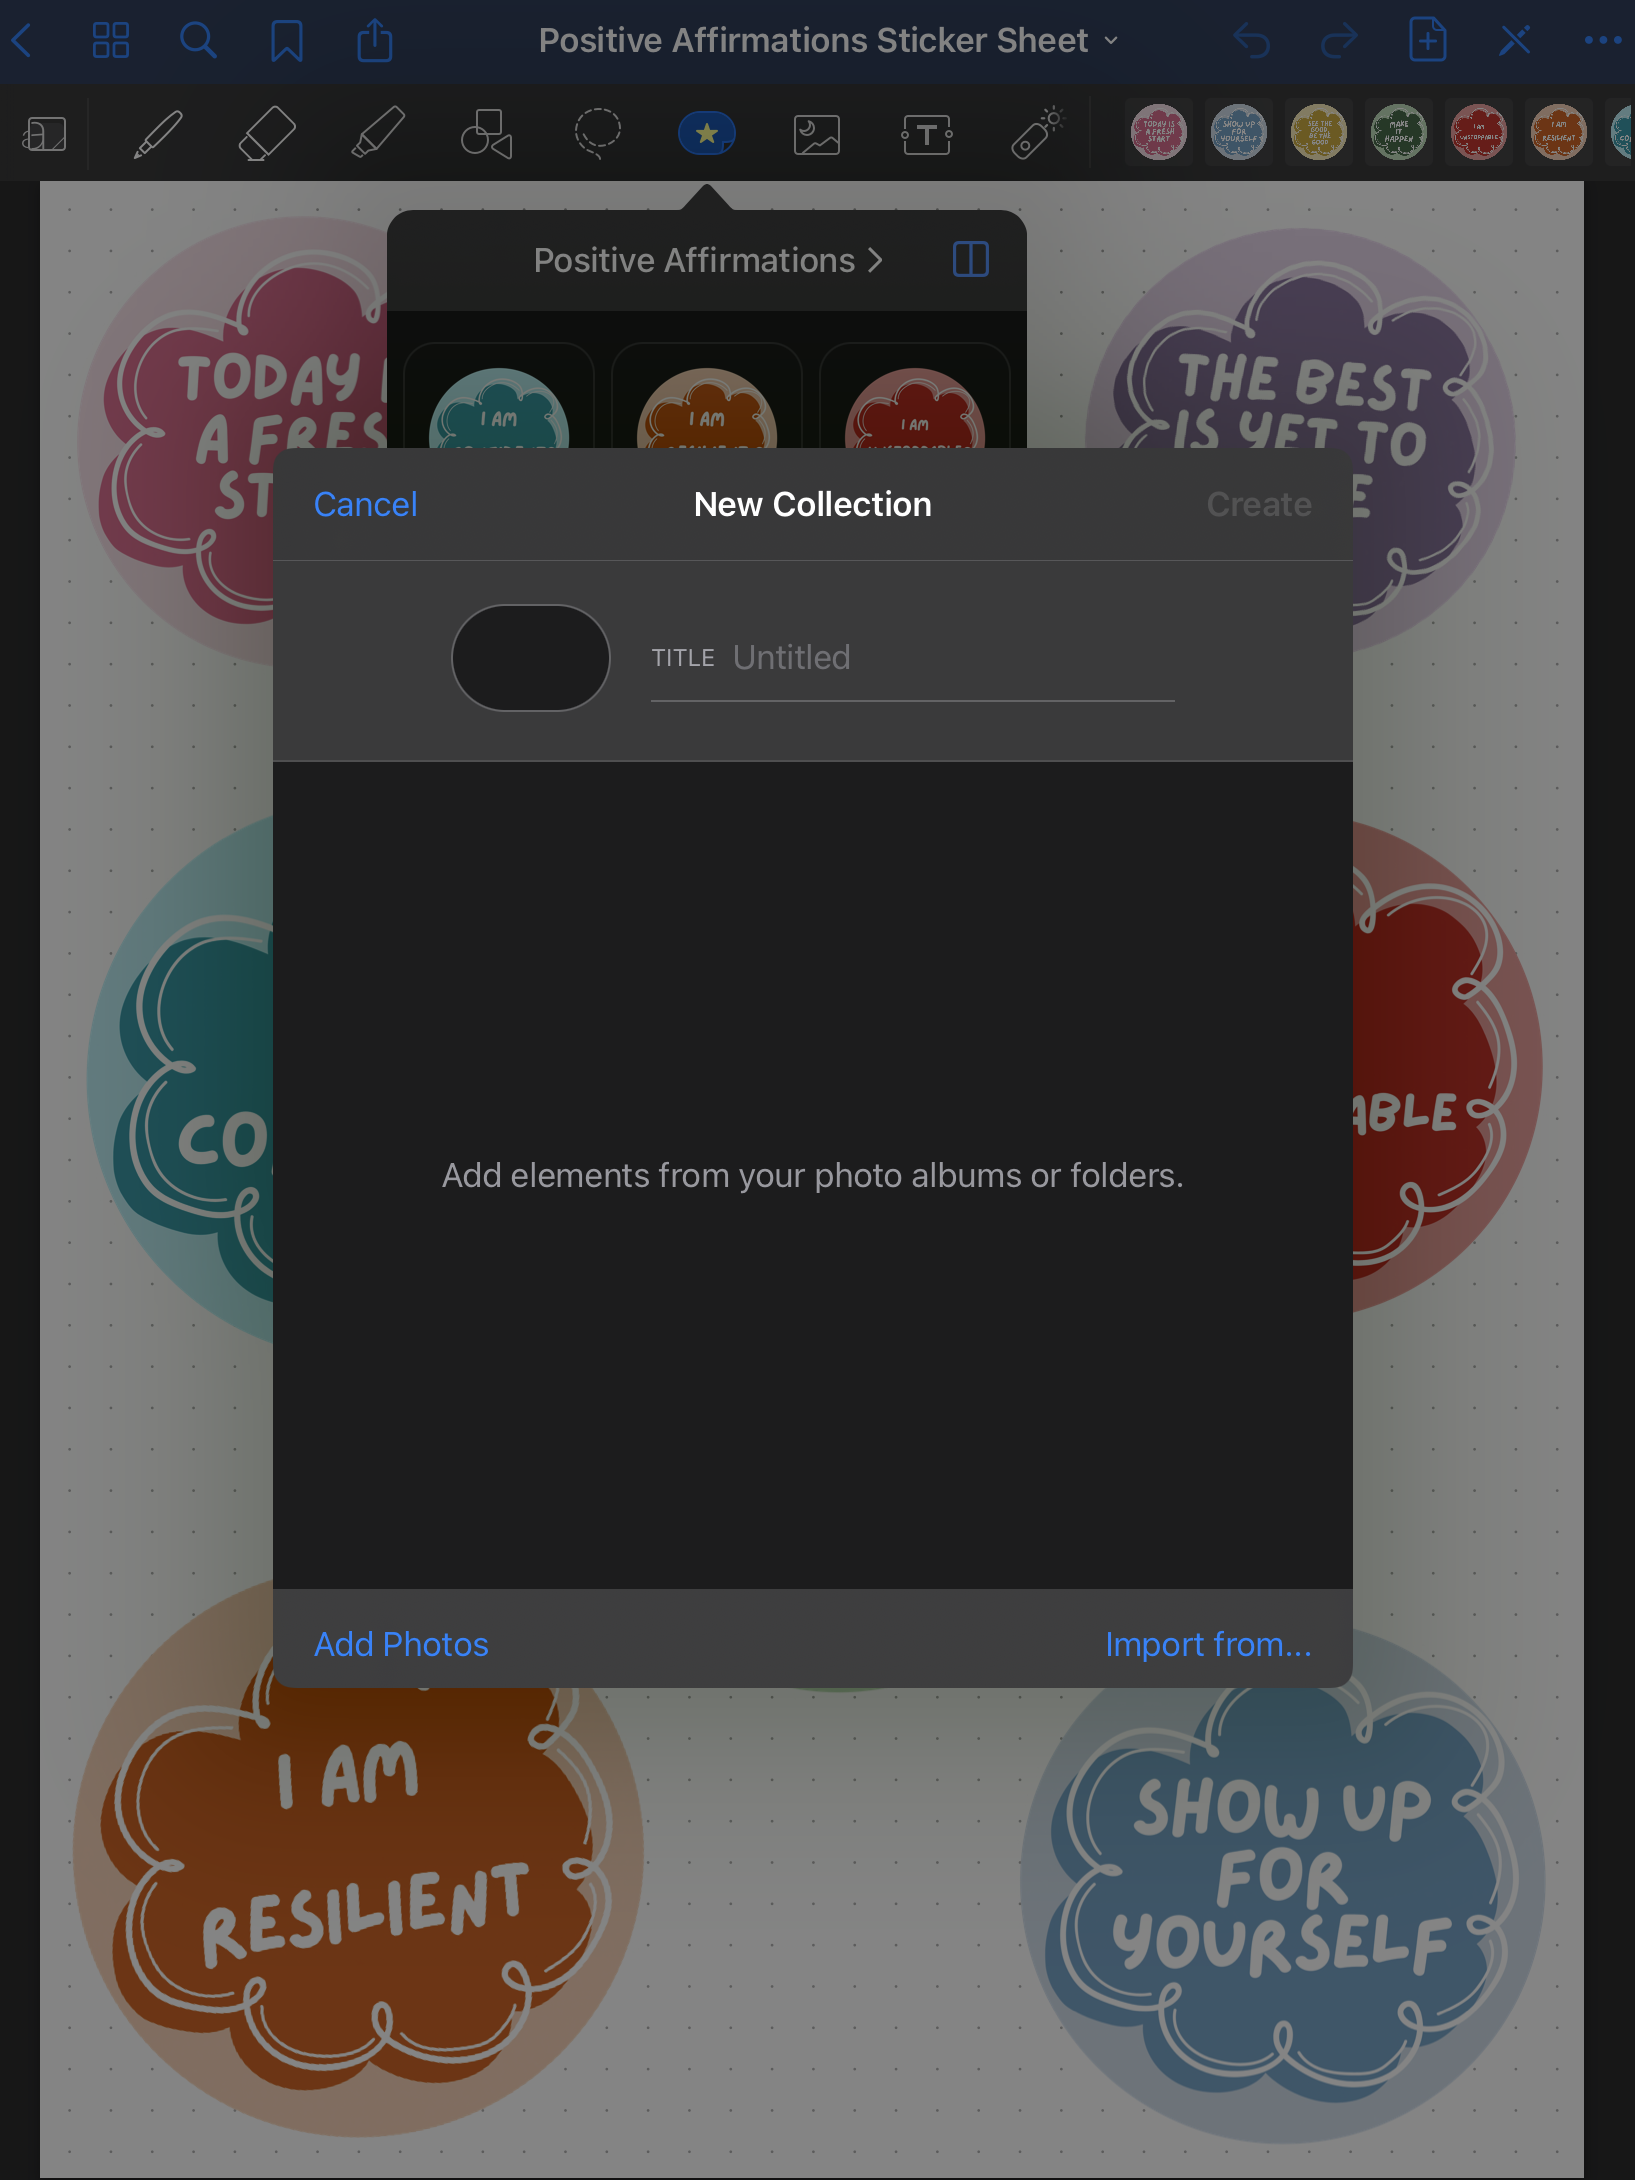
When you click on ‘Import from…’ it will let you select the png or jpeg file you want to add to the collection. This is a good method if you do not have (or prefer not to use) a sticker book or sheet.
Conclusion
Thank you for reading my beginner’s guide to digital stickers! They’re a fun tool to use if you want to personalize a digital planner or even some school notes. Even creating stickers can be a fun creative outlet!
I’ll be posting more sticker packs in my gumroad profile, so feel free to check it out here! In the meantime, you can start with a free sticker pack of positive affirmations.
If you have any questions or additional tips and resources, feel free to comment below!
